What is Recipe Management? and How can it be implemented on Intouch?
So to get started we will see what I am referring to a recipe. There are many batch processes in the industries. For Example, let’s say the industry is manufacturing a Tea powder, coffee powder, and, Milk powder. They have a set of materials in Silo or containers and each product requires a different amount of each material that is to be mixed together in a mixer.
Now, Imagine there are 5 Silos or Containers where the raw materials are stored. For each Recipe or a product the operator selects, the required ratio of the raw materials will get assigned and a trolley or container will collect the specified amount from each silo.
So we have to define the recipe and store it as a CSV file. So when an operator presses a button the data on the CSV file will get assigned to the tags.
Recipe in SCADA
Now let’s see how to assign Recipe in Intouch SCADA,
After opening a new project on Intouch, got to Applications – Recipe manager.
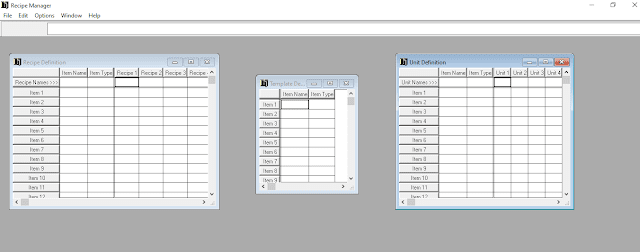
The recipe manager pops up, After clicking on File – New the 3 tables on the figure appears.

These are the CSV files I was talking about. Here we have to enter the data of the recipes or products that a company is gonna manufacture.
Now let me show an example with Coffee and tea as a recipe.
Now on the Template definition table enter all the item names that are present on your recipe. All the values of the recipe are analog in nature so on the item type enter Analog.
On the recipe definition table, you can see that the item names and the recipe are already given. The data is shared from the template definition to over here.
Now Type in the number of recipes on the top under Recipe 1 and so on. After that type the amount required or ratio required of each material for the given recipe.
Refer to the below image for details.
Now moving on to the unit definition table, the item name and type will be reflected here also.
These are the materials that are contained on each silo or containers in the plant. Now we are gonna assign tag names here so that the values of the materials will be sent to those tags at the time of recipe selection.
After entering all the details Click on save and close the recipe manager.
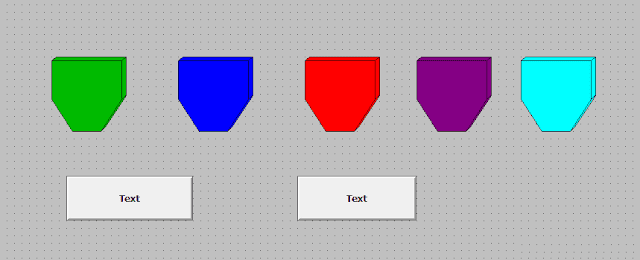
Now let’s go to the screen and design a sample screen, to select a recipe.

Those are some silo objects and I have put two buttons one is for Coffee and the another one is for Tea.
Now click on a button and go to the action from the animations box,

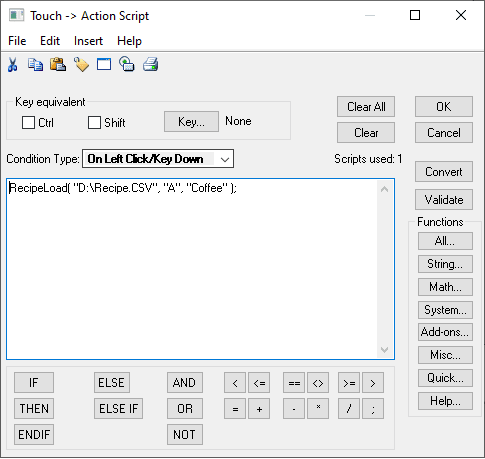
After that, you can either click on all functions and find a function called recipe load or Type in the function as shown in the figure.
Now the first part of the function parameter is the location of the recipe file where you saved. Notice that the type “.CSV” has to be typed after the name of the file.
The second parameter of the function is the unit we have given on the unit definition title.
After that enter the recipe you have to load when the button is pressed. Notice that the Recipe name you have given in the table and here should be exactly the same.
Also, make sure you enclose all the parameters with the double quotes individually.
Now let’s also visualize the values on the run time Now put a Hash symbol above each of silo. Click on the symbol and got to value display and enter the Tag name you have given on the unit definition for each file.
Now let’s go to run time and check. Now when I press coffee the required amount for that recipe from each material will get assigned.
Now when I press tea the required amount for preparing tea from each material gets assigned.


Comments
Post a Comment